Dealing with plastic car grommets can be a frustrating part of auto maintenance, especially when you need to remove fender liners or trim panels. These small fasteners, designed for a snug fit, often become incredibly stubborn, making removal without specialized tools seem impossible. If you’re tired of struggling and potentially damaging your vehicle’s components, this guide is for you. We’ll walk you through a practical, tool-free method for Removing Plastic Car Grommets Without Tool, saving you time and stress.
Understanding the Grommet Gripe
Plastic grommets, also known as plastic rivets or clips, are essential for securing various parts of your car, from fender liners to interior panels. Their design, featuring barbs or expanding sections, ensures a firm hold. However, this same design makes removal challenging. The original poster of the article we’re referencing encountered this exact issue while trying to mount accessories and remove fender liners, highlighting the common frustration many car owners face.
The struggle is real – attempts to pry, push, or wiggle these grommets out often lead to broken clips or, worse, damage to the surrounding car parts. The original author humorously noted resorting to “clipping them with dikes” after failed attempts, perfectly capturing the DIY mechanic’s common experience.
Step-by-Step Guide: Conquering Grommets Without Special Tools
While specialized tools exist for grommet removal, they aren’t always necessary. Here’s a step-by-step approach, inspired by practical experience and focusing on tool-free techniques, to help you safely remove those stubborn plastic car grommets.
Step 1: Accessing the Fender Liner and Grommets
Before tackling the grommets directly, you’ll need to access them. For fender liners, this typically involves:
- Removing Bolts: Locate and remove the bolts that secure the fender liner. These are often found sandwiching the liner between the fender and flare. The original post mentions approximately six bolts, often including two at the very bottom and others along the wheel arch.
- Popping Top Fasteners: Next, identify and remove any barbed fasteners located at the top of the fender liner. These are usually easier to pop out compared to the grommets. If these break, replacements are readily available online, such as the uxcell 9mm x 8mm Hole Plastic Car Fender Fir Tree Clips.
Step 2: The Nippers Solution for Stubborn Grommets
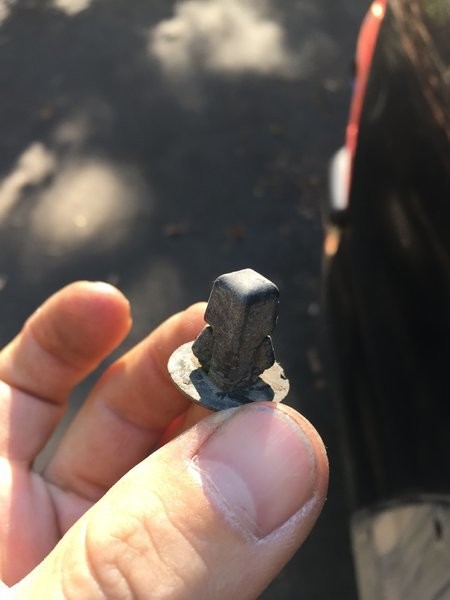
Now for the main challenge: removing the square-bodied, round-headed grommets. As the original author found, these can be incredibly stubborn. Instead of wrestling with pry bars that might deform the plastic, the most effective tool-free method involves using nippers or diagonal cutters.
Here’s how to use nippers effectively:
- Position the Nippers: Carefully position the nippers to grip the neck of the grommet, as close to the base as possible. Avoid cutting into the fender liner or surrounding car body.
- Cut Strategically: Make small, controlled cuts into the grommet’s neck. The goal isn’t to completely sever it immediately, but to weaken its hold.
- Pry and Wiggle: After making a few cuts, try gently wiggling and prying the grommet. The weakened neck should allow it to release more easily. You might need to make a few more small cuts and repeat the wiggle-and-pry process.
- Complete Removal: Once sufficiently weakened, the grommet should pop out. If necessary, you can make a final cut to completely remove it.
Why Nippers Work: Nippers provide a precise cutting action, allowing you to target the grommet without damaging surrounding areas. By weakening the grommet’s structure instead of brute-force prying, you minimize the risk of breaking the grommet itself or damaging the mounting points on your car.
Step 3: Removing the Liner
With the grommets removed, the fender liner should now be easy to pull out. If you encounter any resistance, double-check for any remaining fasteners or bolts you might have missed.
Important Considerations and Warnings
-
Flare Removal Caution: The original poster initially attempted to remove the fender flares to access the grommets, which led to breaking some flare clips. As highlighted in the updated post, removing the liner first is recommended to avoid unnecessary flare removal and potential damage.
-
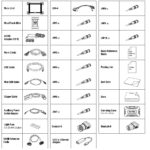
Grommet Replacement: Since you’ll likely need to cut the grommets for removal, have replacements on hand. These are inexpensive and readily available online, like the 15 Fender Liner Screw Grommets Tacoma T100 4 Runner mentioned in the original post.
-
Patience is Key: Rushing the process can lead to mistakes and damage. Work methodically and take your time, especially when using nippers.
Conclusion: DIY Grommet Removal Made Easier
Removing plastic car grommets without specialized tools doesn’t have to be a nightmare. By understanding the grommet’s design and using a strategic approach with nippers, you can effectively remove even the most stubborn fasteners. Remember to prioritize caution, take your time, and have replacement grommets ready for reassembly. This DIY method empowers you to tackle auto maintenance tasks efficiently, saving you frustration and potential repair costs.