
An in-depth exploration into the correct operation and upkeep of Park Tool Micro Adjust Clamps, specifically focusing on the 100-3D model.
Understanding Your 100-3D Micro-Adjust Clamp
Park Tool Micro-Adjust Clamps, including the robust 100-3D, are designed with three interface configurations to suit various repair stand models.
A key safety feature of the 100-3D clamp is part #1951, a small, internally threaded tube extending from the clamp. This is designed to accommodate the #1949 Extension Bolt. It’s crucial to ensure this bolt is installed and properly secured. This bolt acts as a vital safety mechanism, preventing the clamp from detaching and falling should it loosen from the top tube. The bolt head catches inside the top tube, safeguarding both the clamp and potentially preventing damage to the bike or injury.
Correct Clamp Operation for Park Tool 100-3D
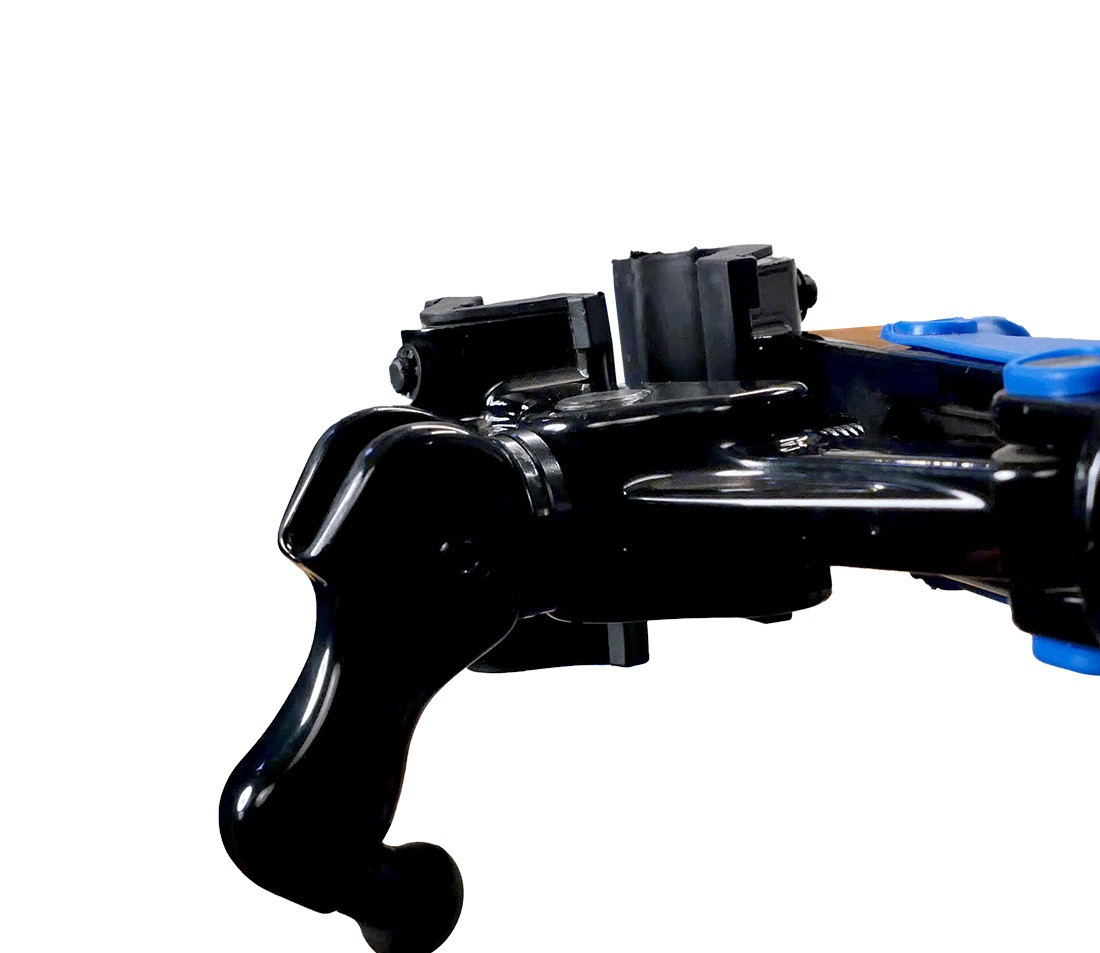
To effectively use your Park Tool 100-3D Micro-Adjust Clamp, begin with the cam handle in the open position. These clamps are designed to be loosely fitted initially, with the handle flipped back to allow for bike placement.
Position your bicycle within the clamp jaws. Once the bike is securely in place, flip the handle forward to engage the clamp.
Use the handle to carefully adjust the clamping pressure to your needs. This micro-adjustment feature is what makes the Park Tool 100-3D so versatile and safe for various frame types.
To remove your bike, simply loosen the clamp handle by half a turn and then flip the cam lever to release the pressure.
The Park Tool 100-3D clamp offers rotational adjustment, allowing for optimal bike positioning on either side of the repair stand, adapting to your workspace and preferences.
Replacing Jaw Covers on Your 100-3D Clamp
Over time, the jaw covers on your Park Tool 100-3D clamp may wear down. Replacement is straightforward using the #1960 cover set, specifically designed for Park Tool clamps.
To replace the covers, first, remove the old, worn covers from the clamp jaws. Cutting pliers can be useful to carefully remove the old covers if they are stuck or hardened.
Install the new jaw covers, ensuring the side with the relief is oriented inwards, facing the bike frame. A pedal wrench, used as a small tube, can help seat the covers firmly into place.
Secure each cover using the provided clips on each stud. Your replacement jaw cover set may include either E-clips or internal tooth style clips.
For E-clips, use needle-nose pliers for installation. For internal tooth clips, position the clip over the stud and use a socket, like the ST-3, to push it straight down for secure fitting.
Saddle Cradle Pad Replacement for 100-3D Clamps
The Park Tool 100-3D Micro-Adjust Clamp includes a replaceable saddle cradle pad (part #1950). This cradle is essential for hanging bikes by their saddle, and maintaining it ensures stable bike support.
To replace the saddle cradle pad, begin by removing the two small screws securing the cradle.
Next, detach the C-clip from the body pin. Carefully extract the pin and remove the old, worn pad. Exercise caution during pin removal to avoid losing the internal spring mechanism.
Install the new saddle cradle pad and reassemble by re-inserting the pin, securing it with the C-clip, and finally, re-attaching the screws.
Maintaining the Cam Assembly of Your 100-3D Clamp
Regular maintenance of the cam assembly is crucial for the smooth and reliable operation of your Park Tool 100-3D clamp. Periodically apply grease to the bolt threads and under the handle washers. Also, lightly grease the plates located beneath the handle.
Apply a drop of light lubricant, such as CL-1 synthetic chain lube, at the interface of the handle and clamp screw.
Regularly check that the handle bolt (#1964) is securely tightened. If it was loose, applying threadlocker is recommended to prevent future loosening. Similarly, ensure the spinner knob bolt (#1968) is also snug and secure.
By following these guidelines for usage and maintenance, you can ensure your Park Tool 100-3D Micro-Adjust Clamp remains a reliable and durable tool in your bike repair arsenal for years to come.