
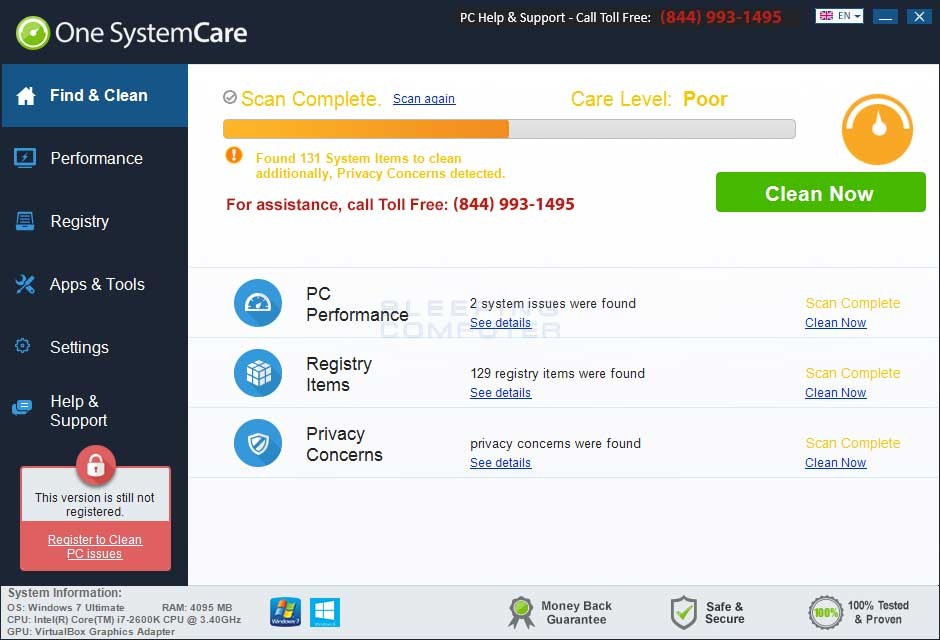
One System Care is advertised as a system optimization tool that promises to boost your computer’s performance and safeguard your privacy by cleaning up the registry and deleting unnecessary files. Upon installation, it performs a system scan, identifying alleged issues related to PC performance, registry entries, and privacy. To resolve these so-called problems, One System Care prompts users to purchase the full version of the software.
However, the reality of One System Care is far less beneficial than its claims. Many of the issues it flags are either non-existent or inconsequential to your computer’s actual performance. For instance, while orphaned uninstall entries in the Windows Registry might be technically unnecessary, they do not negatively impact your system’s speed or efficiency.
Furthermore, Microsoft explicitly advises against the use of registry cleaners in an official support article. They warn that such utilities can lead to “serious issues” by improperly modifying the registry, and consequently, Microsoft does not support the use of these tools.
Adding to these concerns, numerous antivirus and security software vendors flag One System Care as a Trojan, Potentially Unwanted Program (PUP), or adware. This widespread detection underscores the program’s questionable nature and potential risks.
Given these factors, it’s clear that One System Care is not a tool that enhances your system. Instead, it’s more likely to be a deceptive program that provides little to no real value while potentially posing risks to your computer’s stability and security. Therefore, removing One System Care is highly recommended.
How Did One System Care Get on Your Computer?
Understanding how One System Care infiltrates systems is crucial for preventing future unwanted software installations. Typically, One System Care is bundled within the installers of free software applications. This practice, known as bundling, often lacks transparent disclosure, meaning users may unknowingly agree to install One System Care alongside their intended free program.
To avoid such unwanted installations, vigilance during software installation processes is paramount. Always scrutinize license agreements and installation screens meticulously. When presented with installation options, opt for “Custom” or “Advanced” settings. These modes usually reveal any bundled third-party software that might be included. If you spot offers to install toolbars or other undesirable adware, it’s a red flag. Immediately cancel the installation and seek alternative software sources.
While purchasing One System Care might unlock the feature to “fix” the registry entries it identifies, remember that many of these entries are likely harmless. Considering Microsoft’s stance against registry cleaners and the widespread antivirus detections of One System Care as malware, removal is the most prudent course of action. Fortunately, removing One System Care can be accomplished for free using the following guide.
One System Care Removal Guide
This comprehensive guide provides step-by-step instructions to remove One System Care from your computer. While it may seem lengthy due to its detail, each step is designed to be clear and easy to follow, even for users with limited technical experience. Before proceeding, it is strongly advised to back up your important data. If you are uncomfortable with making system changes or following these instructions, consider seeking assistance in online tech support forums where experts can provide personalized help.
Step 1: Initial Preparation
This guide involves multiple steps and utilizes several tools. It’s recommended to read through the entire guide once to familiarize yourself with the process and download all the necessary tools to your desktop before starting the removal process. Printing this page can be helpful as you may need to close your browser or restart your computer during the procedure.
Step 2: Attempt Uninstall via Control Panel
First, we’ll try to uninstall One System Care through the standard Windows uninstall feature. Click the Start button and then select Control Panel.
Step 3: Access Uninstall Programs
In the Control Panel, locate and double-click the appropriate option for your Windows version:
- Windows XP: Double-click Add or Remove Programs.
- Windows Vista, 7, 8, 10, and 11: Double-click Uninstall a program (or Programs and Features).
Step 4: Uninstall One System Care
In the “Add or Remove Programs” or “Uninstall Program” window, scroll through the list of installed programs and locate the entry for One System Care. Double-click on it to initiate the uninstall process. Follow any on-screen prompts to uninstall the program. If prompted to restart your computer during the uninstall, do not restart yet until you have completed all uninstall steps.
Step 5: Close Control Panel
Once the uninstallation process (if successful) is complete, close the Control Panel.
Step 6: Download and Run RKill
To stop any One System Care processes that might interfere with the removal, we will use a tool called RKill. Download RKill to your desktop from the following link:
Rkill
Download Now
On the download page, click the Download Now button labeled iExplore.exe. Save the file to your desktop.
Step 7: Run RKill to Terminate Malicious Processes
Once downloaded, double-click the iExplore.exe icon on your desktop to run RKill. This program will attempt to terminate processes associated with One System Care and other malware. Be patient as RKill scans and closes malicious processes. When finished, a black window will close automatically, and a log file may open. Review the log file and close it. If you encounter issues running iExplore.exe, try downloading other renamed versions of RKill from the RKill download page.
Important: Do not restart your computer after running RKill, as this will allow the malware processes to restart.
Step 8: Download and Install Malwarebytes Anti-Malware (MBAM)
Next, we will use Malwarebytes Anti-Malware (MBAM) to scan for and remove malware, adware, and potentially unwanted programs. Download Malwarebytes from the official website and save it to your desktop:
Malwarebytes Anti-Malware
Download Now
Step 9: Close Programs and Run MBAM Installer
Close all open programs and windows, including your web browser. Double-click the downloaded MBAM installer file (usually named MBSetup-version.exe) on your desktop to begin installation.
Step 10: Install Malwarebytes
Follow the on-screen prompts to install Malwarebytes. Use default settings during installation. Once installed, the program will launch, and you will see a welcome screen.
Step 11: Start Malwarebytes Free Version
On the welcome screen, click Get Started. You’ll be prompted to purchase a license. To use the free version, click Maybe Later, then Use Malwarebytes Free. Note that the free version provides on-demand scanning and removal but lacks real-time protection. You might be asked to sign up for the newsletter – click Open Malwarebytes Free to proceed to the main program interface.
Step 12: Enable Rootkit Scanning in Malwarebytes
In Malwarebytes, click the Settings (gear icon) in the top-right corner. Go to the Protection tab (or Security depending on your version). Scroll down to Scan options and enable Scan for rootkits by toggling the switch to the “on” position (it should turn blue). Close the Settings window to return to the main screen.
Step 13: Run a Malware Scan with Malwarebytes
Click the Scan button to initiate a scan of your computer. This process may take some time, so be patient.
Step 14: Quarantine Detected Threats
Once the scan is complete, Malwarebytes will display a list of detected threats. Click the Quarantine button to remove all selected items. Malwarebytes will delete the files and registry keys and move them to quarantine. A system reboot might be required to complete the removal process. If prompted to restart, allow it. After rebooting and logging back in, continue with the next steps.
Step 15: Close Malwarebytes
After quarantining the threats and rebooting if necessary, you can close Malwarebytes.
Step 16: Download AdwCleaner
Download AdwCleaner to your desktop. AdwCleaner is a tool specifically designed to remove adware and potentially unwanted programs.
AdwCleaner
Download Now
Step 17: Run AdwCleaner
Double-click the downloaded AdwCleaner.exe file to run it. If prompted by User Account Control, allow it to run. You will be presented with a license agreement. Click I agree to proceed.
Step 18: Scan with AdwCleaner
Click the Scan Now button in AdwCleaner. The program will scan your computer for adware and PUPs. Once the scan is finished, review the results. If you see any programs listed that you recognize and want to keep, uncheck the boxes next to them. If you are unsure, it’s generally safe to leave all detected items checked for removal.
Step 19: Clean with AdwCleaner
Click the Quarantine button in AdwCleaner to remove the detected items. AdwCleaner will prompt you to save any open files as it needs to close programs and restart your computer to complete the cleaning process. Save your work and click OK. AdwCleaner will remove the adware and PUPs and then prompt you to restart your computer.
Click OK to restart your computer.
Step 20: Review AdwCleaner Log
After the reboot and login, AdwCleaner will automatically display a log file in Notepad detailing the files, registry keys, and programs removed. Review the log and then close Notepad.
Step 21: Download HitmanPro
Download HitmanPro to your desktop from the following link:
HitmanPro
Download Now
Download the version compatible with your Windows bit-type (32-bit or 64-bit).
Step 22: Run HitmanPro
Double-click the downloaded HitmanPro file (HitmanPro.exe or HitmanPro_x64.exe) to run it. Click Next to start the scan.
Step 23: Choose HitmanPro Scan Option
At the setup screen, choose your desired scan option. “Yes, create a copy of HitmanPro so I can regularly scan this computer (recommended)” installs a 30-day trial. “No, I only want to perform a one-time scan to check this computer” performs a free one-time scan. Select your option and click Next.
Step 24: Scan and Remove Threats with HitmanPro
HitmanPro will now scan your computer. Once finished, it will display a list of detected threats. Click Next to remove these items. After removal, HitmanPro may prompt for a reboot. If so, click Reboot. Otherwise, click Close.
Step 25: Scan for Vulnerable Software with Secunia PSI (Optional but Recommended)
As malware often exploits vulnerabilities in outdated software, it’s highly recommended to use Secunia PSI (Personal Software Inspector) to scan for and update vulnerable programs on your computer. A guide on using Secunia PSI is available here:
How to detect vulnerable and out-dated programs using Secunia Personal Software Inspector
Are You Protected?
Following these steps should remove One System Care from your computer. If you continue to experience issues, consult additional resources or seek expert help in malware removal forums.
For ongoing protection, consider investing in the premium versions of Malwarebytes Anti-Malware and HitmanPro. While the free versions are effective for cleaning, they lack real-time protection to prevent future infections.
Malwarebytes Premium
Upgrade to Malwarebytes Premium for real-time protection, scheduled scans, and website filtering, ensuring robust defense against future threats.
HitmanPro Premium
Upgrade to HitmanPro Premium for cloud-based, behavioral detection of viruses, Trojans, rootkits, spyware, and other malware, providing proactive protection even against the latest threats.
Disclaimer: We may receive a commission from sales of these recommended products, but our recommendations are based solely on their effectiveness in malware removal and protection.
Self-Help Disclaimer: This guide is for self-help purposes. Use at your own risk. BleepingComputer.com is not responsible for any issues arising from the use of these instructions. For further assistance, seek help in the recommended forums.