
For automotive technicians and DIY enthusiasts, the ability to perform odometer correction is a valuable skill. While many universal odometer correction tools exist on the market, they often fall short when it comes to specific models like the Toyota Prius. After mastering the repair of Prius combination meters, particularly addressing the common “blank speedometer” issue, the next logical step was to explore mileage programming for replacement units. Initially, a menu-driven odometer correction tool, designed for a wide range of vehicles, seemed like the ideal solution. However, it quickly became apparent that correcting the mileage on a Prius demands a more specialized approach. This article delves into the intricacies of odometer correction for American cars, focusing specifically on the Toyota Prius and the techniques required to adjust its mileage accurately.
Understanding Prius Odometer Data Storage
The Toyota Prius, a popular hybrid vehicle in the American market, stores its odometer reading in a manner that requires a deeper understanding than simply plugging in a generic tool. The data isn’t readily accessible through standard OBD2 ports for straightforward correction. Instead, it resides within the car’s combination meter, necessitating a more hands-on approach.
Where is Odometer Data Stored on Toyota Prius?
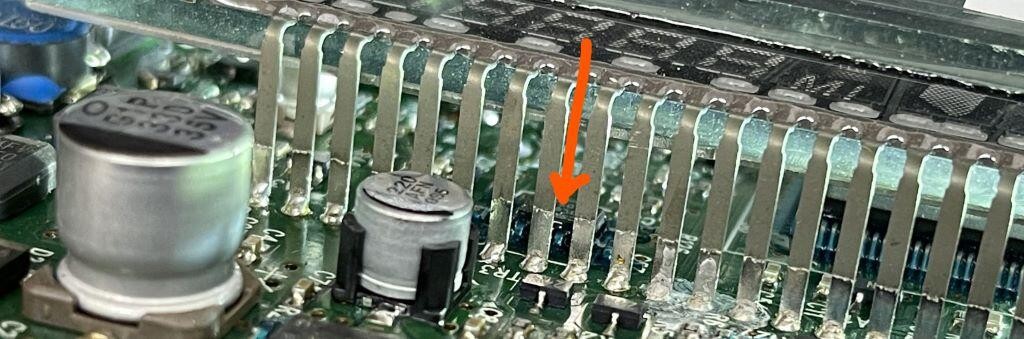
The odometer data, along with other crucial configuration settings, is stored in a 93C66 EEPROM (Electrically Erasable Programmable Read-Only Memory) chip within the Prius combination meter. This chip is conveniently located beneath the LCD (Liquid Crystal Display) screen. However, accessing it is not a simple task. The LCD is secured to the circuit board with approximately 75 through-hole pins, requiring careful desoldering for removal. If you’re planning to access this EEPROM, prepare for a meticulous process involving solder wick and considerable patience. Once the LCD is detached – a process that can easily take up to 30 minutes of continuous desoldering – the next step is to remove the solder mask from the pins of the 93C66 chip. This additional layer of protection adds another layer of complexity to the task.
Decoding Prius Odometer Hex Data
The odometer reading in a Prius is not stored in a straightforward decimal format. Instead, it’s encoded as a 4-digit hexadecimal (hex) code. This might initially seem insufficient, as a 4-digit hex code can only represent numbers up to 65,535 (FFFF in hex). However, Toyota’s system ingeniously multiplies this 4-digit hex code by 17 to arrive at the actual mileage. For example, a hex code of 1673 (which is 5,747 in decimal) translates to 97,699 miles (17 x 5747).
To further complicate things, this hex code isn’t stored just once. Toyota duplicates the 4-digit hex code 17 times within the EEPROM data. So, for a mileage of 97,699, the EEPROM data would contain the sequence 1673 repeated 17 times.
However, real-world mileage isn’t always a multiple of 17. Consider a scenario where the desired mileage is 97,700. Incrementing the hex code from 1673 (5747 decimal) to the next whole number, 1674 (5748 decimal), results in a mileage of 97,716 (17 x 5748). This overshoots the target by 16 miles. This discrepancy highlights that the odometer reading must increment in units of 1 mile, not 16. So how does the Prius system achieve this granular level of mileage adjustment?
The solution lies in a clever combination of two slightly different hex codes. In the EEPROM data, you’ll find a primary hex code repeated multiple times, along with a slightly smaller hex code used to fine-tune the mileage. For instance, to achieve a mileage close to 97,692, the data might consist of the hex code 1673 (5747 decimal) repeated 10 times and the hex code 1672 (5746 decimal) repeated 7 times.
Let’s break down the math:
- 10 repetitions of 1673 (5747 decimal): 10 x 5747 = 57,470
- 7 repetitions of 1672 (5746 decimal): 7 x 5746 = 40,222
Adding these together: 57,470 + 40,222 = 97,692. This is the mileage the odometer will display. The system reads these numbers from left to right, top to bottom, just like reading text.
The Challenges of Simple Hex Editing
While understanding the hex code structure is crucial, directly applying this knowledge by simply mixing and matching combinations of 17 hex codes to achieve a specific mileage will not work as expected. Attempts to directly manipulate these codes often result in unpredictable odometer readings, not the precise increments of one mile desired for accurate correction. Experiments with various combinations might yield changes, but not in the fine-grained manner required. In fact, you might only be able to achieve a limited number of distinct mileage readings, regardless of the hex code combinations you try.
This is where the “mask” comes into play. This “mask” is a critical element in the Prius odometer system. Every time a hex code in the odometer data section is incremented by one from its original value, a corresponding location in the “mask” section is changed from 0000 to FFFF. This “mask” is also 17 spaces long and directly follows the odometer data in the EEPROM. This masking mechanism adds another layer of complexity, preventing simple direct hex editing from being an effective odometer correction method.
EEPROM Programming for Prius Odometer Correction
To effectively perform odometer correction on a Toyota Prius, directly writing to the 93C66 EEPROM chip is necessary. This requires specialized tools and a basic understanding of EEPROM programming.
How to Write to the Prius Combination Meter EEPROM
To write to the EEPROM, you will need an EEPROM reader/programmer. Several options are available in the market. For budget-conscious users, programmers like the XGecu EEPROM programmers available on platforms like EBay and Amazon offer a cost-effective entry point. These programmers typically come with software, although user reviews sometimes mention bugs and potential virus warnings from Windows Defender. While these tools can be a great value, they may require some technical proficiency and troubleshooting, potentially involving online resources like YouTube tutorials to fully understand their operation.
For a more automotive-specific solution with guided instructions and potentially better support, consider options from companies like Andromeda Research Labs. These tools might come at a higher price point but often provide a more user-friendly experience and are tailored for automotive applications.
Setting Up Jumpers for Efficient Programming
Initially, connecting to the EEPROM for programming might involve soldering wires directly to test points on the Prius combination meter board. These wires can then be connected to an adapter compatible with the EEPROM programmer, utilizing the ZIF (Zero Insertion Force) socket for easy chip insertion. While this method is faster than accessing the chip behind the LCD, it can still be time-consuming for repetitive tasks.
To improve efficiency, especially for multiple odometer correction jobs, creating a pogo pin adapter is highly recommended. This can be fashioned from readily available materials like an old pocket screwdriver handle. By drilling holes spaced 0.100 inches apart – achievable with precision tools or careful manual measurement – you can create a housing for spring-loaded pogo pins. These pins, available on platforms like Amazon or EBay in various sizes, provide a spring-loaded contact, eliminating the need for soldering for each programming session.
Investing time in setting up pigtail adapters for both in-circuit and out-of-circuit programming, like SOIC (Small Outline Integrated Circuit) and TSSOP (Thin Shrink Small Outline Package) adapters, will initially take longer than simple jumpers. However, the time saved on subsequent jobs due to faster setup will quickly offset this initial investment, making the process significantly more efficient in the long run.
Verifying Your Correction
Before reinstalling the combination meter back into the Prius, it’s crucial to verify the odometer correction on the bench. This ensures accuracy and avoids unnecessary re-work. Bench testing requires a pinout diagram for the Prius combination meter. A reliable source for this information is Toyota’s Technical Information System (TIS) website.
To test the mileage display, apply 12V+ power to pin 22 and 12V- ground to pin 14 of the combination meter connector. Upon powering up, the meter should display the corrected mileage. Unfortunately, bench testing the speedometer and odometer functionality is more complex. While applying a 5V square wave signal to pin 9 (with frequency corresponding to MPH) might seem like a solution, the speedometer will not register movement unless the car is indicating that it is in gear. The gear signal is communicated from the Hybrid Vehicle ECU (HV ECU) to the gateway ECU, and then to the combination meter via the BEAN network on pins 24/25. Replicating this network traffic for bench testing is a more advanced undertaking, requiring specialized knowledge of network communication protocols, which is beyond the scope of basic odometer correction.
Good luck!
Correcting the odometer on a Toyota Prius, while not as straightforward as with some other American cars, is achievable with the right tools, knowledge, and a methodical approach. By understanding the intricacies of EEPROM data storage, utilizing appropriate EEPROM programming tools, and implementing efficient connection methods, you can successfully adjust the mileage on Prius combination meters. Remember to always verify your work on the bench before final installation.
You may also find these resources helpful:
- A misadventure with a Subaru immobilizer system and keyless entry
- Northridge Fix YouTube channel for micro-soldering techniques.
- A story of fixing the unfixable Prius transmission.
- Repairing a Toyota Hybrid inverter.