Connecting your car to a laptop using an OBD2 MX Bluetooth adapter opens up a world of diagnostics and data analysis. This guide provides a step-by-step walkthrough on how to successfully establish this connection. We’ll cover everything from enabling Bluetooth on your laptop to installing the necessary software and accessing your vehicle’s data.
Enabling Bluetooth and Locating the OBD-II Port
First, ensure Bluetooth is enabled on your laptop. For USB Bluetooth adapters, install the provided drivers. If your laptop has built-in Bluetooth, activate it through your system settings.
Next, locate your vehicle’s OBD-II diagnostic connector. This port is typically found under the dashboard, often near the steering column. It might be hidden behind a plastic cover or in the ashtray/coin tray area.
Connecting the OBD2 MX Bluetooth Adapter
Plug the OBDLink MX Bluetooth adapter into the OBD-II port. Ensure a secure connection. The ‘Power’ LED should turn solid green.
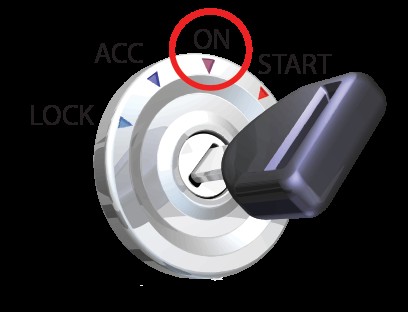
Now, turn your car’s ignition key to the ‘ON’ position without starting the engine. This might be labeled as ‘II’ on some vehicles. This powers up the OBD-II system, allowing it to communicate with the adapter.
Pairing OBDLink MX with Your Laptop
Put the OBDLink MX into discovery mode by pressing the ‘Connect’ button. The ‘BT’ light will blink rapidly, indicating it’s ready to pair. You have a 2-minute window to complete the pairing process.
On your laptop, open the Bluetooth settings by right-clicking the Bluetooth icon in the system tray and selecting ‘Add a Device’. Your laptop will scan for available Bluetooth devices. Select ‘OBDLink’ and click ‘Next’.
Handling Pairing Codes and PINs
You might encounter a pairing code request. If so, ignore the ‘Compare pairing codes’ option, select ‘Yes’, and click ‘Next’. If prompted for a PIN, enter ‘1234’. Some older Bluetooth adapters use PINs directly; enter ‘1234’ if prompted. Upon successful installation, Windows will display a confirmation message.
Installing and Setting Up OBDwiz
Download and install the latest version of OBDwiz, a diagnostic software application. Ensure your OBDLink MX is paired and your car’s ignition is still in the ‘ON’ position.
Auto Detecting and Connecting to Your Vehicle
Launch OBDwiz and click the ‘Auto Detect’ button. The software will automatically configure the connection with your OBDLink MX adapter. A dialog box will confirm the successful device detection.
Next, click the ‘Connect’ button in OBDwiz. The software will identify the communication protocol used by your vehicle. A status screen displays the progress. Choose the ECU with the most Supported PIDs and click ‘Continue’.
Accessing Vehicle Data with OBDwiz
You now have access to your vehicle’s data! OBDwiz allows you to diagnose trouble codes, monitor real-time performance, check emissions readiness, log trips, and more. Explore the various tasks and tabs within the software to utilize its full capabilities. Utilize the action buttons under each tab for specific functions.
By following these steps, you can successfully connect your OBD2 MX Bluetooth adapter to your laptop and unlock valuable insights into your vehicle’s performance and diagnostics. Remember to consult your vehicle and adapter manuals for specific instructions or troubleshooting.

