Dealing with bent car metal can be frustrating, whether it’s a minor dent or a more significant bend. While professional auto body shops have advanced equipment, you can actually create your own Hand Tools To Straighten Bent Car Metal right in your garage. This guide will walk you through building a simple yet effective tool using readily available materials. This DIY approach not only saves you money but also empowers you to handle minor auto body repairs yourself.
Before we begin, gather the necessary materials. You will need four lengths of L bracket and a piece of flat steel stock. For assembly, #8 machine screws are recommended, ideally flat head screws for a smoother finish. If you opt for standard screws, consider using a countersink drill bit to prevent the screw heads from interfering with the tool’s functionality, especially around the hinges.
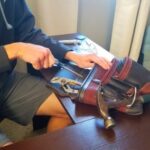
Now, let’s move on to constructing your hand tools to straighten bent car metal. We’ll be working with each L bracket piece individually, labeling them as Part A, B, C, and D for clarity throughout these instructions.
Step-by-Step Guide to Building Your Metal Straightening Tool
This section breaks down the construction process into manageable steps, ensuring you can easily follow along and build your own metal straightening tool.
Preparing Part A
Take the L bracket labeled “Part A”. On one flange, measure and mark a point 1/2 inch from the end along the center line. Drill a hole at this marked location. This hole will serve as a crucial point in the tool’s structure.
Preparing Part B
Next, take “Part B”. Similar to Part A, drill a hole on one flange, 1/2 inch from the end and on the center line. However, pay close attention to the hole’s location difference compared to Part A. This variation is intentional and important for the tool’s operation.
Preparing Part C
For “Part C”, hinge mounting is key. Select one flange and carefully position your hinge. The round part of the hinge should be flush with the edge of the L bracket. Mark and drill four holes suitable for your hinges. Accurate placement here is critical for the tool’s proper articulation. On the opposite flange of Part C, drill a single hole on the center line, 1/2 inch from the end, mirroring the process for Part A.
Preparing Part D
“Part D” is prepared similarly to Part C. Drill four holes on one flange for hinge mounting, ensuring the hinge’s round edge aligns with the L bracket’s edge. On the opposite flange, this time drill two holes, one at each end, both 1/2 inch from the end and on the center line.
Preparing the Flat Steel Stock
Finally, take the 6-inch flat steel stock. Measure and drill two holes. Each hole should be 1/2 inch from the end edge and 1/2 inch from the top edge. These holes will likely be used for handle attachment or further customization of your hand tools to straighten bent car metal.
Conclusion
By following these steps, you’ve constructed the foundational parts for your hand tools to straighten bent car metal. Assembling these parts with hinges and screws will create a functional tool ready for basic auto body work. Remember to always work carefully and consider safety precautions when working with tools and car metal. This DIY approach provides an accessible and cost-effective way to tackle minor dents and bends, showcasing the practicality of homemade hand tools to straighten bent car metal.