Removing a car battery might seem daunting, especially when dealing with an electric vehicle (EV) battery like the Nissan Leaf’s. While professional garages use auto lifts to make this task easier, it’s entirely possible to remove a car battery at home using basic tools and with careful attention to safety. This guide will walk you through the process of safely lifting out a car battery without specialized equipment, focusing on techniques applicable to DIY mechanics.
Essential Tools and Safety Precautions
Before we begin, it’s crucial to understand that this process, especially with EV batteries, involves high voltage systems that can be dangerous if mishandled. Safety is paramount. Always prioritize your well-being and take necessary precautions.
Here’s a list of tools you’ll need and safety gear to wear:
- Electrically Insulating Gloves (Class 0 – 500V): Absolutely essential when dealing with high voltage components.
- Jacks (3 minimum): A mix of jack types can be beneficial, but ensure they are robust enough to support the vehicle and battery weight. A low-profile jack can be very helpful.
- Jack Stands (4 minimum): Never rely solely on jacks. Jack stands are critical for safely supporting the vehicle’s weight while you work underneath.
- Wheel Dollies (2 recommended): These make moving the heavy battery once removed much easier. Furniture dollies or even pipes for rolling can also work.
- Scrap Wood Pieces: For spacing and adjusting jack heights.
- Wrenches and Sockets (10mm, 16mm, 18mm): Both standard and socket wrenches, including an 18mm socket (often missing in standard sets), are needed.
- Impact Driver (1/2″) with 18mm Socket: Significantly eases removal of stubborn bolts.
- Pry Bar: For removing plastic underbody rivets.
- Goggles or Safety Glasses: Essential eye protection, especially when dealing with plastic rivets and undercarriage debris.
- Leather Gloves: For general hand protection and grip.
- Electrical Tape: For insulating exposed high voltage terminals.
- Rubber Mallet: For gently persuading wrenches and sockets.
- Needle-Nose Pliers: Helpful for manipulating small connectors.
- 12V Battery Disconnect Tool (Optional but Recommended): To safely disconnect the 12V accessory battery.
Essential tools for removing a car battery without a lift, including jacks, insulated gloves, wrenches, and safety gear.
Crucial Safety Steps Before Starting:
- High Voltage Warning: EV batteries contain extremely high voltage that can be lethal. If you are not comfortable working with high voltage systems, seek professional help.
- Service Disconnect Procedure: The first and most important safety step is to disconnect the service disconnect. For Nissan Leafs (and many EVs), this is typically located under the rear passenger seat.
- Locate and Access: Find the service disconnect panel.
- Disconnect: Using your 500V gloves, carefully remove the service disconnect. This will split the high voltage battery into safer segments.
- Insulate: Immediately wrap the service disconnect socket with electrical tape to prevent accidental reconnection. Keep the disconnect in your pocket to ensure it remains safely removed.
- Wait for Capacitor Discharge: EV inverters contain capacitors that hold charge even after disconnection. Wait at least 10 minutes after disconnecting the service disconnect before proceeding to work on any orange high voltage cables.
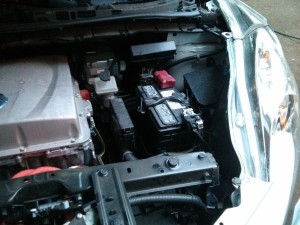
- Disconnect 12V Accessory Battery: Disconnecting the 12V battery further ensures the high voltage system is de-energized. Disconnect both terminals, starting with the negative terminal.
Disconnecting the 12V accessory battery is a crucial safety step in removing a car battery without a lift.
Step-by-Step Guide to Removing the Car Battery
Now that safety precautions are in place, let’s proceed with the battery removal:
Step 1: Prepare the Vehicle and Work Area
- Raise the Vehicle: Use your jacks to lift the car high enough to provide ample clearance to work underneath and slide the battery out. Aim for about 15-16 inches of clearance.
- Secure with Jack Stands: Place jack stands securely under the vehicle’s frame rails. Ensure the car is stable on the jack stands before proceeding. Never work under a car supported only by jacks.
- Clearance Check: Double-check that you have enough space to slide the battery out to the side. Consider the battery dimensions (Nissan Leaf battery is approximately 61″ long x 47″ wide x 10″ tall and weighs over 600 lbs).
Step 2: Remove Underbody Aerodynamic Shields
- Locate Shields: Identify the plastic aerodynamic shields under the battery pack. These are typically in multiple sections.
- Remove Fasteners: Use your 10mm wrench or socket to remove bolts and a pry bar to carefully detach plastic rivets. Wear safety goggles as these rivets can break and fly forcefully.
- Set Aside Shields: Keep the shields and fasteners organized for reassembly.
Removing the underbody aerodynamic shield to access car battery connections and mounting bolts when removing a car battery without a lift.
Step 3: Disconnect High Voltage Cables and Connectors
Remember to wear your 500V gloves for all high voltage connector work.
- Motor HV Cable: Locate the large orange cable leading to the motor.
- Unbolt Bracket: Remove any bolts securing the cable to a bracket.
- Disconnect Connector: Carefully disconnect the cable connector from the battery. Most EV connectors have a multi-step release mechanism (pull lock tab, press release, slide collar).
- Insulate Battery Connector: Immediately cover the battery-side connector with electrical tape.
- Cabin Heater HV Cable: Disconnect the orange cable for the cabin heater, using the same disconnection and insulation procedure as for the motor cable.
- CAN Bus Connector: Disconnect the CAN bus connector (usually a smaller connector). These often have a rotating ring to release them. Tape the wire-side connector to protect it.
Disconnecting high voltage cables and connectors from the car battery before removal without a lift, including motor HV cable and cabin heater HV cable.
High voltage cables disconnected from the car battery, ready for battery removal without a lift.
Step 4: Prepare for Battery Drop
- Locate Battery Mounting Bolts: Identify all bolts securing the battery to the vehicle undercarriage. Typically, there are around 12-16 bolts. For the Nissan Leaf, there are:
- 6 side bolts (3 on each side along the rails) – 18mm
- 2 front bolts – 18mm
- 4 rear bolts – 16mm
- Loosen Side Bolts (Do Not Remove): Loosen the six side bolts but do not fully remove them yet. These will be the last bolts you remove and will help support the battery initially.
- Position Jacks and Dollies: Place your jacks strategically to support the battery weight. Use at least three jacks for stability. Position wheel dollies underneath the battery, ready to receive it. Use wood blocks on top of jacks if needed to reach the battery initially. Ensure jacks are applying slight upward pressure on the battery, but do not lift the car off jack stands.
Jacks and wheel dollies positioned to safely lower and remove a car battery without a lift.
Step 5: Remove Remaining Bolts and Lower the Battery
- Remove Front and Rear Bolts: Working from under the car, fully remove the front and rear battery mounting bolts (18mm and 16mm).
- Remove Side Bolts (From Outside the Car): Move to the side of the car and fully remove the loosened side bolts (18mm). Do not be under the car at this stage.
- Carefully Lower Jacks: Slowly and evenly lower each jack, working back and forth to ensure the battery descends uniformly onto the wheel dollies.
- Adjust and Lower Completely: If using wood blocks on jacks, as the battery lowers, replace blocks with direct jack contact for a controlled descent.
Car battery being carefully lowered onto wheel dollies during removal without a lift.
Jacks supporting the car frame after the car battery has been fully lowered onto dollies for removal without a lift.
Step 6: Slide Out the Battery
- Check Clearance: Ensure you have enough side clearance to roll the battery out. You might need to slightly raise one side of the car for extra room.
- Roll Out Battery: Using the wheel dollies, carefully roll the battery out from under the car. You can attach ropes or chains to the battery frame for better control while pulling.
Conclusion
Removing a car battery without a lift is a significant undertaking that demands careful planning, the right tools, and strict adherence to safety procedures. While it’s achievable for experienced DIYers, always prioritize safety and consider seeking professional assistance if you are unsure at any step. Remember to take your time, double-check every connection and bolt, and most importantly, stay safe when working with high voltage systems.