
Toy car restoration, especially for classic Matchbox models, is a rewarding hobby that brings vintage toys back to life. Many enthusiasts are surprised to learn that you don’t need a vast array of specialized equipment to get started. In fact, a modest collection of tools, many of which you might already own, is sufficient. While advanced tools can enhance your restoration process, it’s often best to begin with hand tools, mastering the basics before moving on to more complex techniques. This guide will walk you through the essential tools you’ll need to embark on your toy car restoration journey, focusing on practicality and effectiveness.
Magnification: Seeing the Details
For anyone involved in detailed work, especially as we age, magnification becomes indispensable. When restoring toy cars, observing minute details is crucial for tasks like paint touch-ups or examining rivet damage. Fortunately, magnification tools range from simple and inexpensive to more advanced options, catering to different needs and budgets.
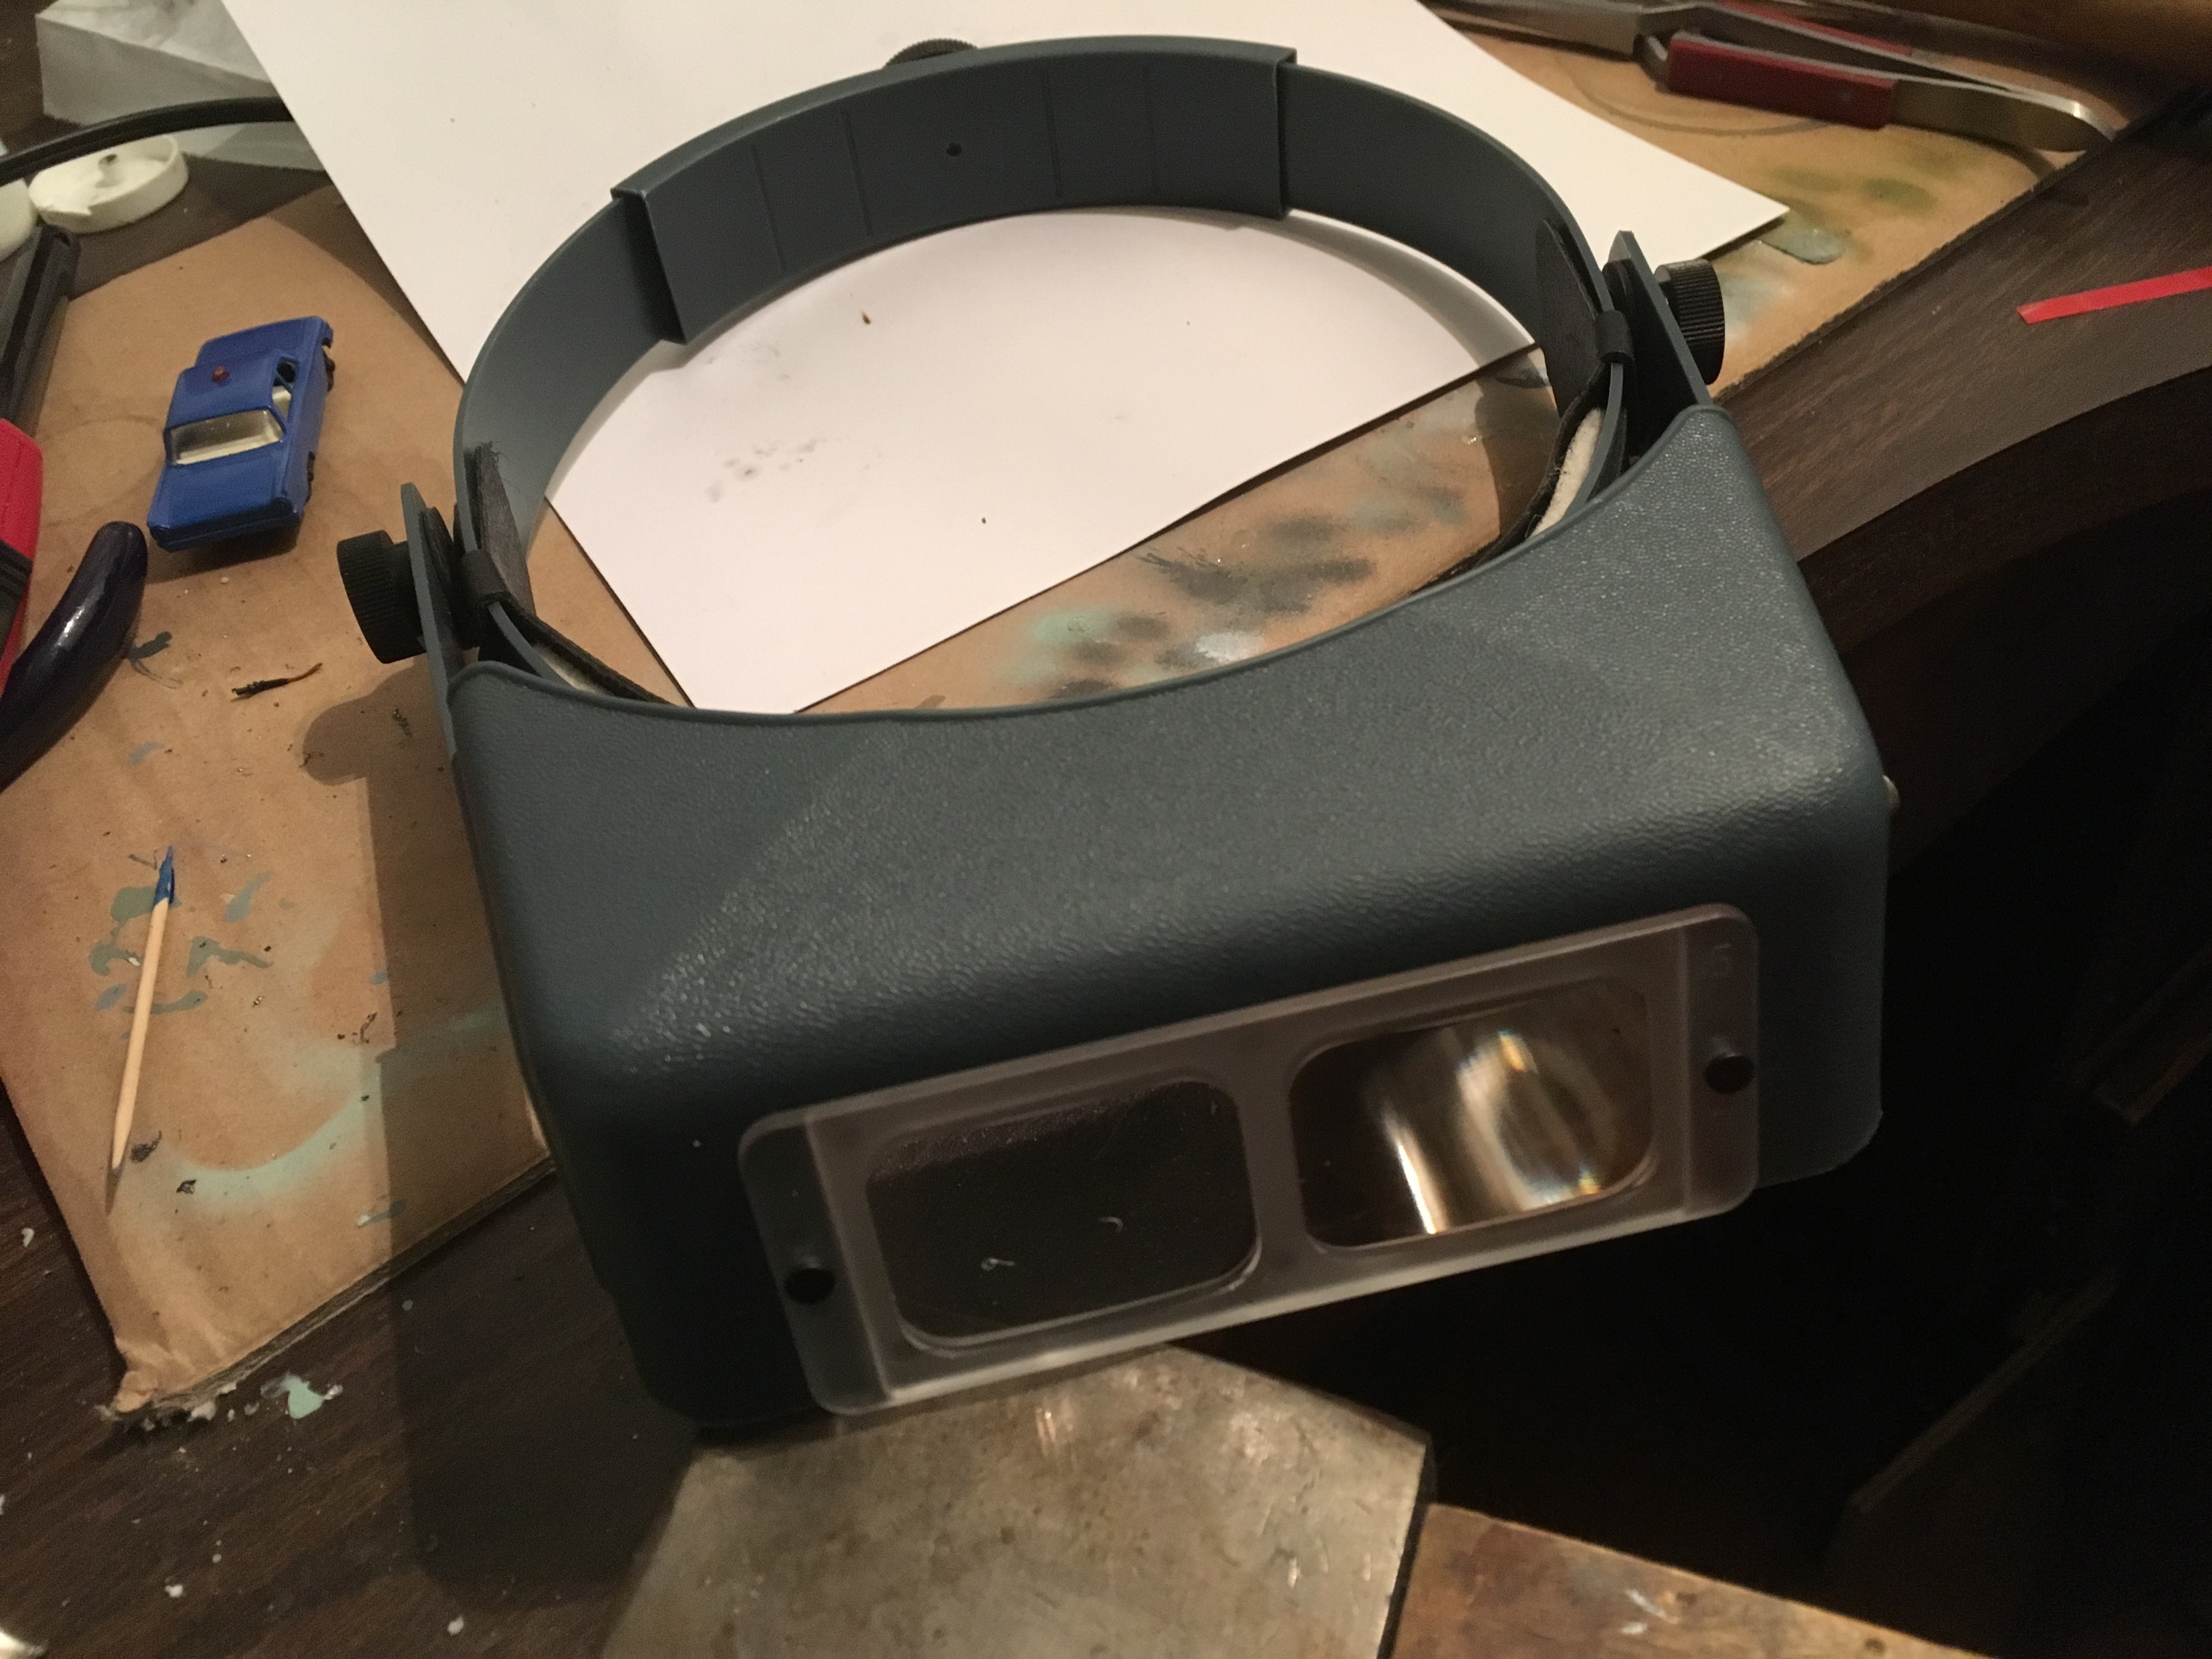
My Optivisor… shoulda bought these a long time ago.
Starting with budget-friendly solutions, simple reading glasses, particularly those around +3 strength, can offer helpful magnification for close-up work. These are readily available and a great entry point. Moving up a step, head-mounted magnifiers like the OptiVisor are a fantastic mid-range option. These provide hands-free magnification, allowing you to work comfortably. OptiVisors are available with either plastic or glass lenses. While both are effective, glass lenses offer superior clarity and scratch resistance, making them a worthwhile upgrade for serious restorers. For the ultimate in magnification, a stereo dissection microscope is an advanced tool. These microscopes offer significant magnification and are excellent for examining parts in extreme detail. However, they are generally larger, heavier, and may be overkill for most Matchbox car restorations, often being more beneficial for highly detailed inspections rather than routine work. For most restoration tasks, an OptiVisor strikes the perfect balance between magnification power and practicality.
Rivet Removal and Replacement Tools
Classic Matchbox cars are typically assembled using rivets, which are often integrated into the car’s body casting. Disassembly for restoration requires the careful removal of these rivets, and reassembly necessitates a reliable replacement method.
The standard method for rivet removal involves drilling. A 1/4″ drill bit, used with a hand drill, is the most common tool for this task. The process involves carefully drilling into the rivet head just enough to remove the flared portion, allowing the body to be separated from the baseplate. Precision is key here to avoid damaging the surrounding diecast.
For reassembly, since the original rivet is destroyed during removal, alternative methods are needed. Epoxy glue is a simple and widely used solution. A small dab of epoxy effectively secures the body back to the baseplate. However, for a more authentic and reversible approach, tapping and screwing is a superior method. This involves drilling and tapping the rivet post to accept a 2-56 button head screw.
This method requires additional tools: 2-56 button head screws (ideally 3/16″ or 1/8″ length), a 2-56 tap, and a #50 (.070″) drill bit. Purchasing multiple taps and drill bits is advisable as they are brittle and prone to breakage, especially when working with Zamak, the alloy used in Matchbox cars. While Zamak is soft, careful and slow tapping is still essential to prevent damage. A 1/16″ drill bit can be used as an alternative to the #50, though it’s slightly undersized, making tapping more difficult. When tapping, it’s crucial to advance the tap a little and then reverse to clear chips, preventing the tap from binding and breaking. Patience and a steady hand are crucial to avoid drilling too deep and damaging the car body.
Wheel and Axle Tools
Wheels on regular-wheel Matchbox cars are attached using soft steel pins or axles. Early models used axles that were squeezed, while later models featured peened axles, recognizable by one axle head being larger than the other. Removing and reinstalling these wheels requires specific tools and techniques.
My “axle squeezing” pliers are on the left. The pair on the right is an unmodified pair of smooth-jawed needlenose that would make a good pair of axle squeezers if you cut off most of the length.
To remove wheels attached with peened axles, modified smooth-jawed needle-nose pliers are essential. The key is to use pliers with smooth jaws, as serrated jaws will damage the axles. Inexpensive pliers are often smooth and suitable for this task. Modifying the pliers by shortening them can make them easier to handle. The technique involves gently squeezing and rotating the peened end of the axle to round it out, allowing the wheel to slip off. Care must be taken to avoid squeezing too hard, which can deform the axle into an oval shape, making wheel removal and reinstallation problematic.
Over-squeezing can also lead to work hardening of the steel axle, making it brittle. Annealing, heating the axle end to red hot and allowing it to cool slowly, can prevent work hardening. A small propane torch is suitable for this process. If axle ends are severely deformed, a rotary tool like a Dremel with a small grinding wheel might be necessary to carefully grind away the burr. Resources like Marty’s Matchbox Makeovers and Tinman’s Restoration Handbook offer detailed guidance on this technique.
For re-installing wheels, a jeweler’s hammer, also known as a chasing hammer, is the ideal tool. It should be an all-metal hammer, as those with plastic or rubber heads are not effective for peening axles. Light taps are crucial to avoid bending the axle. A bench vise with a flat spot or a jeweler’s anvil provides a solid surface to hammer against. Alternatively, a drill press can be used for re-riveting axles, offering more precision. This method, often seen in Marty’s videos, involves using modified nails in the drill press to apply even pressure to the axle ends. While effective, using a jeweler’s hammer offers a more traditional approach and leaves subtle marks that can indicate the model has been restored, which is important for collectors.
Other Useful Restoration Tools
Beyond the specialized tools for rivets and axles, a variety of other tools can significantly aid in toy car restoration.
A small wire brush, similar to a toothbrush, is invaluable for paint removal when used with chemical paint strippers. While sandpaper is generally too abrasive for diecast surfaces, wire brushes effectively remove paint from large areas and crevices. Brass brushes are gentler, while steel brushes are more aggressive but can scratch the diecast. Steel wool or bronze wool can be used for achieving a smooth finish.
A jeweler’s hammer
A soft toothbrush is perfect for gently cleaning plastic parts like interiors and wheels. Dental picks are excellent for removing stubborn paint remnants from cracks and crevices after stripping. While dental picks can scratch, careful use can actually enhance casting details.
Paintbrushes in various small sizes are necessary for touch-up painting and detailing. An X-acto knife and scribers are useful for fine detailing and removing imperfections. Needle files are helpful for shaping and smoothing metal parts. While some restorers use airbrushes for painting, spray cans with enamel paint are a convenient and durable alternative, closely resembling the original factory finish, although color choices may be limited. If using spray cans or airbrushes with solvent-based paints, adequate ventilation is crucial due to VOCs. Similarly, paint strippers should be used with caution and in well-ventilated areas.
Jeweler’s Tools: Fine Detail Work
Jeweler’s tools, while not strictly essential, can be incredibly useful for toy car restoration, particularly for intricate tasks.
A jeweler’s bench pin is a work support that clamps to your workbench, providing a stable platform for filing, sanding, riveting, and other detailed work. Its size is ideal for supporting Matchbox cars during these operations.
My jeweler’s bench pin
Pin vises are another valuable jeweler’s tool. These are used to hold small tools like 2-56 taps, needles for scribing, or small files, offering enhanced control and precision. Custom scribers can be made by mounting needles in pin vises or creating handles with needles epoxied in place.
My pin vise set… they needed some cleanup and tuning, and I had to make the tray holder.
This list provides a solid foundation of tools for restoring toy cars. Many restorers expand their tool collections over time, drawing from various fields like model building, jewelry making, and machining. Experimentation and personal preference often dictate the specific tools used in any given restoration project. As you gain experience, you’ll discover which tools work best for you and your restoration style.
Share this:
Like Loading…